In android, by using TextToSpeech class we can easily convert our text into voice and it supports different types of speaking languages. We can choose the speaking language based on our requirements in the android application.
Generally, the android TextToSpeech instance can only be used to synthesize text once it has completed its initialization so implement TextToSpeech.OnInitListener to notify the completion of initialization.
During the initialization, we can set the audio pitch rate, audio speed, type of language to speak, etc. based on our requirements.
Following is the code snippet of converting text to voice using TextToSpeech class in android applications.
public class MainActivity extends AppCompatActivity implements TextToSpeech.OnInitListener {
....
TextToSpeech textToSpeech;
@Override
public void onInit(int status) {
if (status == TextToSpeech.SUCCESS) {
int result = textToSpeech.setLanguage(Locale.US);
String text = speakText.getText().toString();
textToSpeech.speak(text, TextToSpeech.QUEUE_FLUSH, null, null);
}
}
....
}
If you observe above code, we used TextToSpeech.OnInitListener to notify the completion of initialization and used TextToSpeech class to convert entered text to voice.
Now we will see how to use the TextToSpeech component to convert the given text to speech conversion in android application with examples.
Android TextToSpeech Example
Following is the example of converting the given text to voice using an android TextToSpeech object.
Create a new android application using android studio and give names as TextSpeechExample. In case if you are not aware of creating an app in android studio check this article Android Hello World App.
Once we create an application, open activity_main.xml file from \res\layout folder path and write the code like as shown below.
activity_main.xml
<?xml version="1.0" encoding="utf-8"?>
<LinearLayout xmlns:android="http://schemas.android.com/apk/res/android"
android:orientation="vertical" android:layout_width="match_parent"
android:layout_height="match_parent">
<TextView
android:id="@+id/fstTxt"
android:layout_width="wrap_content"
android:layout_height="wrap_content"
android:layout_marginLeft="100dp"
android:layout_marginTop="150dp"
android:text="Enter Text to Speak"/>
<EditText
android:id="@+id/txtSpeak"
android:layout_width="wrap_content"
android:layout_height="wrap_content"
android:layout_marginLeft="100dp"
android:ems="10"/>
<Button
android:id="@+id/btnSpeech"
android:layout_width="wrap_content"
android:layout_height="wrap_content"
android:layout_marginLeft="100dp"
android:text="Speak" />
</LinearLayout>
Now open your main activity file MainActivity.java from \java\com.tutlane.textspeechexample path and write the code like as shown below
MainActivity.java
package com.tutlane.textspeechexample;
import android.os.Build;
import android.speech.tts.TextToSpeech;
import android.support.v7.app.AppCompatActivity;
import android.os.Bundle;
import android.util.Log;
import android.view.View;
import android.widget.Button;
import android.widget.EditText;
import java.util.Locale;
public class MainActivity extends AppCompatActivity implements TextToSpeech.OnInitListener {
Button speakBtn;
EditText speakText;
TextToSpeech textToSpeech;
@Override
protected void onCreate(Bundle savedInstanceState) {
super.onCreate(savedInstanceState);
setContentView(R.layout.activity_main);
speakText = (EditText) findViewById(R.id.txtSpeak);
speakBtn = (Button)findViewById(R.id.btnSpeech);
textToSpeech = new TextToSpeech(this, this);
speakBtn.setOnClickListener(new View.OnClickListener() {
@Override
public void onClick(View v) {
texttoSpeak();
}
});
}
@Override
public void onInit(int status) {
if (status == TextToSpeech.SUCCESS) {
int result = textToSpeech.setLanguage(Locale.US);
if (result == TextToSpeech.LANG_MISSING_DATA || result == TextToSpeech.LANG_NOT_SUPPORTED) {
Log.e("error", "This Language is not supported");
} else {
texttoSpeak();
}
} else {
Log.e("error", "Failed to Initialize");
}
}
@Override
public void onDestroy() {
if (textToSpeech != null) {
textToSpeech.stop();
textToSpeech.shutdown();
}
super.onDestroy();
}
private void texttoSpeak() {
String text = speakText.getText().toString();
if ("".equals(text)) {
text = "Please enter some text to speak.";
}
if (Build.VERSION.SDK_INT >= Build.VERSION_CODES.LOLLIPOP) {
textToSpeech.speak(text, TextToSpeech.QUEUE_FLUSH, null, null);
}
else {
textToSpeech.speak(text, TextToSpeech.QUEUE_FLUSH, null);
}
}
}
If you observe above code, we are converting the text to speech conversion using TextToSpeech class.
Output of Android TextToSpeech Example
When we run the above example in the android emulator we will get a result like as shown below.
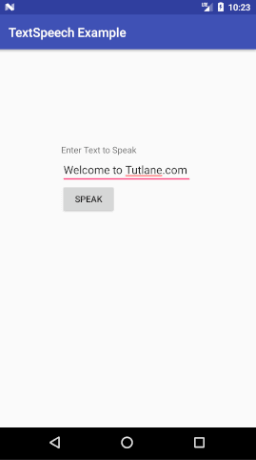
If you observe the above result, once we enter text and click on the Speak button, the entered text converted to voice based on the language which we selected in the application.
This is how we can convert text to speech in android applications using TextToSpeech object based on our requirements.