In android, Grid View is a ViewGroup that is used to display items in a two dimensional, scrollable grid and grid items are automatically inserted to the gridview layout using a list adapter.
Generally, the adapter pulls data from sources such as an array or database and converts each item into a result view and that’s placed into the list.
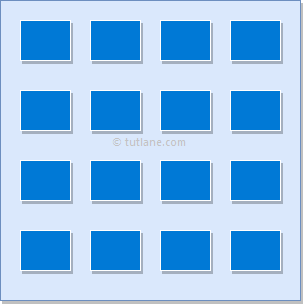
Following is the pictorial representation of GridView in android applications.
In android, Adapter will act as an intermediate between the data sources and adapter views such as ListView, Gridview to fill the data into adapter views. The adapter will hold the data and iterates through items in the data set and generate the views for each item in the list.
Generally, in android we have a different types of adapters available to fetch the data from different data sources to fill the data into adapter views, those are
| Adapter | Description |
|---|---|
| ArrayAdapter | It will expect an Array or List as input. |
| CurosrAdapter | It will accept an instance of a cursor as an input. |
| SimpleAdapter | It will accept a static data defined in the resources. |
| BaseAdapter | It is a generic implementation for all three adapter types and it can be used for ListView, Gridview or Spinners based on our requirements |
Following is the simple example showing user details using GridView and showing the position of a particular image when clicking on it in android applications.
Create a new android application using android studio and give names as GridView. In case if you are not aware of creating an app in android studio check this article Android Hello World App.
Once we create an application, add some sample images to project /res/drawable directory to show the images in GridView.
Now open an activity_main.xml file from /res/layout path and write the code like as shown below
<?xml version="1.0" encoding="utf-8"?>
<GridView xmlns:android="http://schemas.android.com/apk/res/android"
android:id="@+id/gridview"
android:layout_width="match_parent"
android:layout_height="match_parent"
android:columnWidth="110dp"
android:numColumns="auto_fit"
android:verticalSpacing="10dp"
android:horizontalSpacing="10dp"
android:stretchMode="columnWidth"
android:gravity="center" />
Once we are done with creation of layout, we need to create a custom adapter (ImageAdapter.java) by extending it using BaseExtender to show all the items in the grid, for that right click on java folder à Give name as ImageAdapter.java and click OK.
Open ImageAdapter.java file and write the code like as shown below
package com.tutlane.gridview;
import android.content.Context;
import android.view.View;
import android.view.ViewGroup;
import android.widget.BaseAdapter;
import android.widget.GridView;
import android.widget.ImageView;
/**
* Created by tutlane on 24-08-2017.
*/
public class ImageAdapter extends BaseAdapter {
private Context mContext;
public ImageAdapter(Context c) {
mContext = c;
}
public int getCount() {
return thumbImages.length;
}
public Object getItem(int position) {
return null;
}
public long getItemId(int position) {
return 0;
}
// create a new ImageView for each item referenced by the Adapter
public View getView(int position, View convertView, ViewGroup parent) {
ImageView imageView = new ImageView(mContext);
imageView.setLayoutParams(new GridView.LayoutParams(200, 200));
imageView.setScaleType(ImageView.ScaleType.CENTER_CROP);
imageView.setPadding(8, 8, 8, 8);
imageView.setImageResource(thumbImages[position]);
return imageView;
}
// Add all our images to arraylist
public Integer[] thumbImages = {
R.drawable.img1, R.drawable.img2,
R.drawable.img3, R.drawable.img4,
R.drawable.img5, R.drawable.img6,
R.drawable.img7, R.drawable.img8,
R.drawable.img1, R.drawable.img2,
R.drawable.img3, R.drawable.img4,
R.drawable.img5, R.drawable.img6,
R.drawable.img7, R.drawable.img8,
R.drawable.img1, R.drawable.img2,
R.drawable.img3, R.drawable.img4,
R.drawable.img5
};
}
If you observe above code we referred some images, actually those are the sample images which we added in /res/drawable directory.
Now we will bind images to our GridView using our custom adapter (ImageAdapter.java), for that open main activity file MainActivity.java from \java\com.tutlane.gridview path and write the code like as shown below.
package com.tutlane.gridview
import android.support.v7.app.AppCompatActivity;
import android.os.Bundle;
import android.view.View;
import android.widget.AdapterView;
import android.widget.GridView;
import android.widget.Toast;
public class MainActivity extends AppCompatActivity {
@Override
protected void onCreate(Bundle savedInstanceState) {
super.onCreate(savedInstanceState);
setContentView(R.layout.activity_main);
GridView gv = (GridView) findViewById(R.id.gvDetails);
gv.setAdapter(new ImageAdapter(this));
gv.setOnItemClickListener(new AdapterView.OnItemClickListener() {
public void onItemClick(AdapterView<?> parent, View v, int position, long id) {
Toast.makeText(MainActivity.this, "Image Position: " + position, Toast.LENGTH_SHORT).show();
}
});
}
}
If you observe above code, we are binding image details to GridView using our custom adapter (ImageAdapter.java) and calling our layout using setContentView method in the form of R.layout.layout_file_name. Here our xml file name is activity_main.xml so we used file name activity_main.
Generally, during the launch of our activity, onCreate() callback method will be called by android framework to get the required layout for an activity.
When we run above example using the android virtual device (AVD) we will get a result like as shown below.

This is how we can bind images to GridView using Adapter in android applications based on our requirements.
In above example, we implemented an image gallery using gridview in android application. Now we will extend the functionality of above example to show the selected grid image in full screen.
Now we need to create a new layout (image_details.xml) file in project /res/layout directory to show the image details, for that right click on the layouts folder à select New à Layout resource file à Give name as image_details.xml and click OK. Now open newly created file (image_details.xml) and write the code like as shown below.
<?xml version="1.0" encoding="utf-8"?>
<LinearLayout xmlns:android="http://schemas.android.com/apk/res/android"
android:orientation="vertical" android:layout_width="match_parent"
android:layout_height="match_parent">
<ImageView android:id="@+id/full_image_view"
android:layout_width="match_parent"
android:layout_height="match_parent" />
</LinearLayout>
Now we need to create a custom activity (FullImageActivity.java) to show the image details in our newly created layout (image_details.xml) file, for that right click on java folder à select New à Java Class à Give name as FullImageActivity.java and click OK.
Open FullImageActivity.java file and write the code like as shown below
package com.tutlane.gridview;
import android.app.Activity;
import android.content.Intent;
import android.os.Bundle;
import android.widget.ImageView;
/**
* Created by tutlane on 24-08-2017.
*/
public class FullImageActivity extends Activity {
@Override
public void onCreate(Bundle savedInstanceState) {
super.onCreate(savedInstanceState);
setContentView(R.layout.image_details);
// Get intent data
Intent i = getIntent();
// Get Selected Image Id
int position = i.getExtras().getInt("id");
ImageAdapter imageAdapter = new ImageAdapter(this);
ImageView imageView = (ImageView) findViewById(R.id.full_image_view);
imageView.setImageResource(imageAdapter.thumbImages[position]);
}
}
Now we need to include our newly created activity file (FullImageActivity.java) in AndroidManifest.xml file like as shown below. For that, open AndroidManifest.xml file and write the code like as shown below
<?xml version="1.0" encoding="utf-8"?>
<manifest xmlns:android="http://schemas.android.com/apk/res/android"
package="com.tutlane.gridview">
<application
android:allowBackup="true"
android:icon="@mipmap/ic_launcher"
android:label="@string/app_name"
android:roundIcon="@mipmap/ic_launcher_round"
android:supportsRtl="true"
android:theme="@style/AppTheme">
<activity android:name=".MainActivity">
<intent-filter>
<action android:name="android.intent.action.MAIN" />
<category android:name="android.intent.category.LAUNCHER" />
</intent-filter>
</activity>
<!-- FullImageActivity -->
<activity android:name=".FullImageActivity"></activity>
</application>
</manifest>
Now we need to modify gridview image click function in main activity file (MainActivity.java) to get image details and show it in new activity.
Open main activity file (MainActivity.java) and write the code like as shown below.
package com.tutlane.gridview;
import android.content.Intent;
import android.support.v7.app.AppCompatActivity;
import android.os.Bundle;
import android.view.View;
import android.widget.AdapterView;
import android.widget.GridView;
public class MainActivity extends AppCompatActivity {
@Override
protected void onCreate(Bundle savedInstanceState) {
super.onCreate(savedInstanceState);
setContentView(R.layout.activity_main);
GridView gv = (GridView) findViewById(R.id.gvDetails);
gv.setAdapter(new ImageAdapter(this));
gv.setOnItemClickListener(new AdapterView.OnItemClickListener() {
public void onItemClick(AdapterView<?> parent, View v, int position, long id) {
// Sending image id to FullScreenActivity
Intent i = new Intent(getApplicationContext(), FullImageActivity.class);
// passing array index
i.putExtra("id", position);
startActivity(i);
}
});
}
}
If you observe above code, we are getting the selected image details on image click and sending those details to our newly created activity file to show the image in full screen.
When we run above example using android virtual device (AVD) we will get a result like as shown below.

This is how we can build image gallery in gridview and show the selected image in android applications based on our requirements.