Firebase Cloud Messaging (FCM) is a cross-platform (Android, iOS, Mobile Web) messaging solution which is used to send notification messages to the mobile devices at no cost.
By using firebase we can easily send messages to any device or schedule messages to send in the user’s local time zone based on our requirements.
We don’t need to write much coding to send notifications and firebase will provide a detailed engagement and conversion tracking for notification messages.
Following is the pictorial representation of how firebase will work with android applications to send or receive messages.

In android, by using Firebase Cloud Messaging (FCM) we can easily push notifications to the mobile devices which will contain our mobile app. Now we will see how to use firebase cloud messaging in our android applications to push notifications based on our requirements.
Following is the example of using Firebase Cloud Messaging to push the notifications to the mobile devices which will contain our android application.
Create a new android application using android studio and give names as PushNotification. In case if you are not aware of creating an app in android studio check this article Android Hello World App.
Once we are done with creation of a new app, we need to integrate a Firebase in our android applications to push notifications.
To add Firebase to our android app first, we need to create a Firebase project and Firebase configuration file for our app.
To create a Firebase project. Open Firebase Console and it will ask you to login with Google mail account. Once we are logged in, select Add Project like as shown below.

Once we click on Add Project, a new popup will open in that enter required details like project name, country and click on Create Project like as shown below.

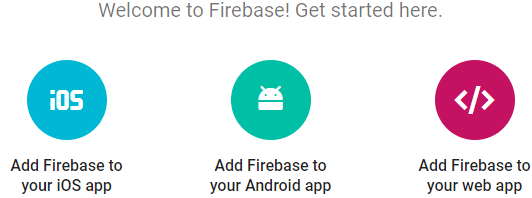
Once we click on Create Project, our project will be created. Now we need to add Firebase to our android app for that we need to select Add Firebase to your Android App option from the available options like as shown below.
Once we select the required platform, a new popup will open in that we need to enter our app package name. This package name must be same as which we defined in our android AndroidMaifest.xml file and click Register App button like as shown below.

Once we register our app, we will get google-services.json file to download and add it to our project app folder like as shown below.

Once we add the downloaded google-services.json file in our project app folder that will be like as shown below.

Now we need to modify our application build.gradle file in project level (<project>/build.gradle) to include our firebase plugin file (google-services.json) like as shown below.
Now open app level build.gradle (<project>/<app-module>/build.gradle) and make following changes at the bottom of file.
apply plugin: 'com.android.application'After adding the required dependencies click on Sync Now option in the right side to sync our project with required files.
Once we are done with registering our app with firebase, we need to integrate firebase cloud messaging in our android application to send notifications.
To integrate FCM (firebase cloud messaging) in the android app, we need to create a new class file FireBaseMessaging.java in \java\com.tutlane.pushnotifications path and write the code like as shown below.
package com.tutlane.pushnotifications;
import android.app.NotificationManager;
import android.app.PendingIntent;
import android.content.Context;
import android.content.Intent;
import android.media.RingtoneManager;
import android.net.Uri;
import android.support.v4.app.NotificationCompat;
import com.google.firebase.messaging.FirebaseMessagingService;
import com.google.firebase.messaging.RemoteMessage;
/**
* Created by surdasari on 21-09-2017.
*/
public class FireBaseMessaging extends FirebaseMessagingService {
@Override
public void onMessageReceived(RemoteMessage rMsg) {
sendNotification(rMsg.getNotification());
}
private void sendNotification(RemoteMessage.Notification rNotfy) {
Uri soundUri = RingtoneManager.getDefaultUri(RingtoneManager.TYPE_NOTIFICATION);
Intent rintent = new Intent(this, MainActivity.class);
PendingIntent pendingIntent = PendingIntent.getActivity(this, 0, rintent, 0);
NotificationCompat.Builder builder = new NotificationCompat.Builder(this)
.setContentTitle(rNotfy.getTitle())
.setContentText(rNotfy.getBody())
.setAutoCancel(true)
.setSmallIcon(R.drawable.ic_notification)
.setSound(soundUri)
.setContentIntent(pendingIntent);
NotificationManager notificationManager = (NotificationManager) getSystemService(Context.NOTIFICATION_SERVICE);
notificationManager.notify(0, builder.build());
}
}
If you observe above code, we are extending our class (FireBaseMessaging.java) file behaviour using FirebaseMessagingService class. The FirebaseMessagingService class is the base class to communicate with firebase messaging and it provide a functionality to display the notifications automatically.
Now we need to register our newly created class files in AndroidManifest.xml file like as shown below
<?xml version="1.0" encoding="utf-8"?>
<manifest xmlns:android="http://schemas.android.com/apk/res/android"
package="com.tutlane.pushnotifications">
<uses-permission android:name="android.permission.INTERNET"/>
<application
android:allowBackup="true"
android:icon="@mipmap/ic_launcher"
android:label="@string/app_name"
android:roundIcon="@mipmap/ic_launcher_round"
android:supportsRtl="true"
android:theme="@style/AppTheme">
<activity android:name=".MainActivity">
<intent-filter>
<action android:name="android.intent.action.MAIN" />
<category android:name="android.intent.category.LAUNCHER" />
</intent-filter>
</activity>
<service
android:name=".FireBaseMessaging">
<intent-filter>
<action android:name="com.google.firebase.MESSAGING_EVENT"/>
</intent-filter>
</service>
</application>
</manifest>
If you observe above code, we registered our FireBaseMessaging class in the AndroidManifest.xml file and added a permission to access the INTERNET because firebase cloud messaging required INTERNET access to show the notifications.
Generally, during the launch of our activity, the onCreate() callback method will be called by the android framework to get the required layout for an activity.
When we run the above example using an android virtual device (AVD) we will get a result like as shown below.

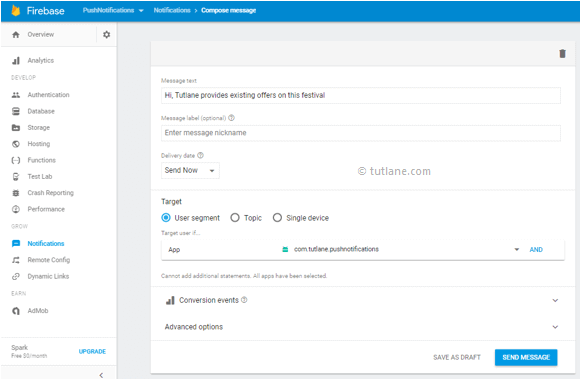
To publish or push notifications, we need to visit Firebase Console and open our app by clicking on it. After that, click on the Notifications tab in the left panel. In case, if you visit first time, click on Send Your First Message otherwise click on New Message.
After that enter Message Text, select Target as User Segment then select your app from the list and click on Send Message like as shown below.
Once we click on the Send Message button, we will get a notification in our app like as shown below.

This is how we can push notifications using firebase cloud messaging in android applications based on our requirements.