In android, Image Button is a user interface control that is used to display a button with an image and to perform an action when a user clicks or taps on it.
By default, the ImageButton looks same as normal button and it performs an action when a user clicks or touches it, but the only difference is we will add a custom image to the button instead of text.
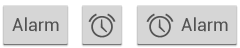
Following is the pictorial representation of using Image Buttons in android applications.
In android, we have different types of buttons available to use based on our requirements, those are Button, ImageButton, ToggleButton, and RadioButton.
In android, we can add an image to the button by using <ImageButton> attribute android:src in XML layout file or by using the setImageResource() method.
In android, we can create ImageButton control in two ways either in the XML layout file or create it in the Activity file programmatically.
Following is the sample way to define ImageButton control in XML layout file in android application.
<?xml version="1.0" encoding="utf-8"?>
<LinearLayout xmlns:android="http://schemas.android.com/apk/res/android"
android:orientation="vertical" android:layout_width="match_parent"
android:layout_height="match_parent">
<ImageButton
android:id="@+id/addBtn"
android:layout_width="wrap_content"
android:layout_height="wrap_content"
android:src="@drawable/add_icon" />
</LinearLayout>
If you observe above code snippet, here we defined ImageButton control and we are showing the image from drawable folder using android:src attribute in xml layout file.
In android, we can create ImageButton control programmatically in activity file based on our requirements.
Following is the example of creating ImageButton control dynamically in an activity file.
LinearLayout layout = (LinearLayout)findViewById(R.id.l_layout);
ImageButton btn = new ImageButton(this);
btn.setImageResource(R.drawable.add_icon);
layout.addView(btn);
Generally, whenever the user clicks on ImageButton, the ImageButton object will receives an on-click event.
In android, we can define button click event in two ways either in XML layout file or create it in Activity file programmatically.
We can define click event handler for button by adding android:onClick attribute to the <ImageButton> element in our XML layout file.
The value of android:onClick attribute must be the name of method which we need to call in response to a click event and the Activity file which hosting XML layout must implement the corresponding method.
Following is the example of defining a button click event using android:onClick attribute in XML layout file.
android:onClick="addOperation"/>
</LinearLayout>
In Activity that hosts our XML layout file, we need to implement click event method like as shown below
/** Called when the user touches the button */
public void addOperation(View view) {
// Do something in response to button click
}
In android, we can define ImageButton click event programmatically in Activity file rather than XML layout file.
To define button click programmatically, create View.OnClickListener object and assign it to the button by calling setOnClickListener(View.OnClickListener) like as shown below.
ImageButton btnAdd = (ImageButton)findViewById(R.id.addBtn);
btnAdd.setOnClickListener(new View.OnClickListener() {
public void onClick(View v) {
This is how we can handle ImageButton click events in android applications based on our requirements.
Following are some of the commonly used attributes related to ImageButton control in android applications.
| Attribute | Description |
|---|---|
| android:id | It is used to uniquely identify the control |
| android:src | It is used to specify the source file of an image |
| android:background | It is used to set the background color for an image button control. |
| android:padding | It is used to set the padding from left, right, top and bottom of the image button. |
| android:baseline | It is used to set the offset of the baseline within the view. |
Following is the example of defining a one ImageButton and two EditText controls in LinearLayout to get the data of EditText controls when click on ImageButton in android application.
Create a new android application using android studio and give names as ButtonExample. In case if you are not aware of creating an app in android studio check this article Android Hello World App.
Now open an activity_main.xml file from \res\layout path and write the code like as shown below
<?xml version="1.0" encoding="utf-8"?>
<LinearLayout xmlns:android="http://schemas.android.com/apk/res/android"
android:orientation="vertical" android:layout_width="match_parent"
android:layout_height="match_parent" android:id="@+id/l_layout">
<TextView
android:id="@+id/fstTxt"
android:layout_width="wrap_content"
android:layout_height="wrap_content"
android:layout_marginLeft="100dp"
android:layout_marginTop="150dp"
android:text="First Number"/>
<EditText
android:id="@+id/firstNum"
android:layout_width="wrap_content"
android:layout_height="wrap_content"
android:layout_marginLeft="100dp"
android:ems="10"/>
<TextView
android:id="@+id/secTxt"
android:layout_width="wrap_content"
android:layout_height="wrap_content"
android:text="Second Number"
android:layout_marginLeft="100dp" />
<EditText
android:id="@+id/secondNum"
android:layout_width="wrap_content"
android:layout_height="wrap_content"
android:layout_marginLeft="100dp"
android:ems="10" />
<ImageButton
android:id="@+id/addBtn"
android:layout_width="wrap_content"
android:layout_height="wrap_content"
android:layout_marginLeft="100dp"
android:src="@drawable/add_icon" />
</LinearLayout>
If you observe above code we created one ImageButton, two TextView controls and two EditText controls in XML Layout file.
Once we are done with the creation of layout with required control, we need to load the XML layout resource from our activity onCreate() callback method, for that open main activity file MainActivity.java from \java\com.tutlane.buttonexample path and write the code like as shown below.
package com.tutlane.buttonexample;
import android.support.v7.app.AppCompatActivity;
import android.os.Bundle;
import android.view.View;
import android.widget.EditText;
import android.widget.ImageButton;
import android.widget.Toast;
public class MainActivity extends AppCompatActivity {
@Override
protected void onCreate(Bundle savedInstanceState) {
super.onCreate(savedInstanceState);
setContentView(R.layout.activity_main);
final EditText firstNum = (EditText)findViewById(R.id.firstNum);
final EditText secNum = (EditText)findViewById(R.id.secondNum);
ImageButton btnAdd = (ImageButton)findViewById(R.id.addBtn);
btnAdd.setOnClickListener(new View.OnClickListener() {
@Override
public void onClick(View v) {
if(firstNum.getText().toString().isEmpty() || secNum.getText().toString().isEmpty())
{
Toast.makeText(getApplicationContext(), "Please fill all the fields", Toast.LENGTH_SHORT).show();
}
else {
int num1 = Integer.parseInt(firstNum.getText().toString());
int num2 = Integer.parseInt(secNum.getText().toString());
Toast.makeText(getApplicationContext(), "SUM = " + (num1 + num2), Toast.LENGTH_SHORT).show();
}
}
});
}
}
If you observe above code we are calling our layout using setContentView method in the form of R.layout.layout_file_name in our activity file. Here our xml file name is activity_main.xml so we used file name activity_main and we are getting the values from two EditText controls on ImageButton click and performing an addition operation.
Generally, during the launch of our activity, the onCreate() callback method will be called by the android framework to get the required layout for an activity.
When we run the above example using an android virtual device (AVD) we will get a result like as shown below.

This is how we can use ImageButton control in android applications to perform required operations on ImageButton tap or click based on our requirements.