By using android studio IDE (Integrated Development Environment) we can implement required android apps based on our requirements.
To implement the android hello world app first we need to set up a development environment using android studio IDE which is freely provided by Google for Android developers. In case if you are not aware of how to setup android development environment, follow step by step Android Environment Setup tutorial.
Once we are done with Android Studio Installation, open android studio and that will be like as shown below.

Here we're going to choose the New Project option because we haven’t created any other project and we need to create a new one. So, we will select the New Project from the given options.
However, we can choose Import Project if we’d like to import a project from any other way, for example, Eclipse project into Android Studio. Android Studio will convert the Eclipse project to an Android Studio project, adding the necessary configuration files for us.
If we select Open Project from the list of options, we can open projects created with either Android Studio or IntelliJ IDEA.
Check out from Version Control, we can check out a copy of a project that's under version control. This is a great way to quickly get up to speed with an existing project.
To get us started, choose New Project from the list of options. This will show us a list of options to configure our new project.
As we click on “New Project” from the above option, then the next screen will be open like this, where we have to mention our Project’s name, Company domain and Project location (we called it the main path where this application will be saved) because the Package name will be created automatically as we create the project in Android Studio.

After entering all the details if we click on the “Next” button another screen will appear where we have select the different platforms and SDK targets like as shown below based on our requirements.

Here we need to select the type of Platform which we are going to use for the Application development like if we select “Phone and Tablet”, then it will show it’s different API and SDK version and similar to others.
If we choose “Wear”, then it will show it’s API and SDK versions like as shown below.
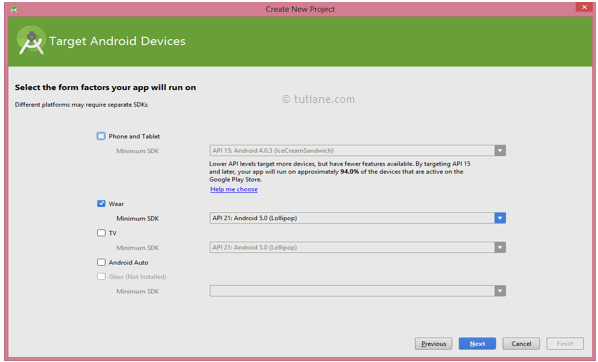
In case if we choose “TV”, then it will show it’s API and SDK versions like as shown below.

Wear: We use this option for Android Watches which we can wear to our hand and use the same functionality as we do with the Android devices. You can call, set the alarm, capture images, and many more things easily.
TV: We use this option for SmartIPTV which is very common these days. We can see our favorite channels like we see in our Home Televisions and make the changes in the channel easily.
Here we are going to implement an app for phones and tablets, so we selected a Phone and Tablet option and click “Next” and it will install required components like as shown below.

Now click Next to select the particular Activity for our requirement. If we will select the “Empty Activity”, then it will show the empty activity in our layout. In case if we choose other options, then it will show the activity which we have chosen. Here we are selecting Empty Activity like as shown below.

After choosing the “Activity” for our application, then click on the “Next” button and it will take you to the next screen like as shown below.
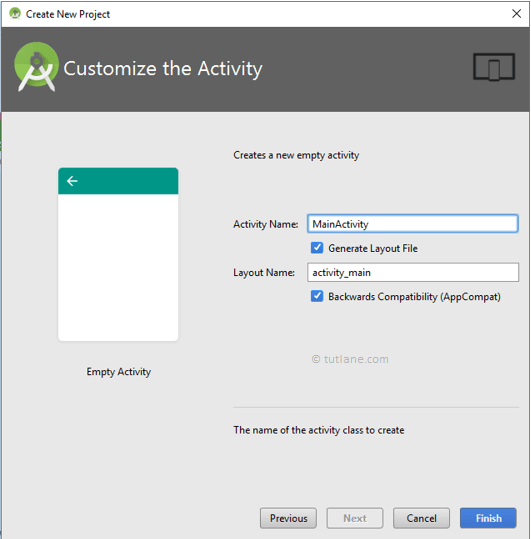
Here we can see that the Activity i.e. EmptyActivity which we selected in the previous section and the java file name i.e. “MainActivity”. Now we are ready for the final step, just click on the “Finish” button and it will take you to the Main page where we have to do the coding and create new layouts over there.
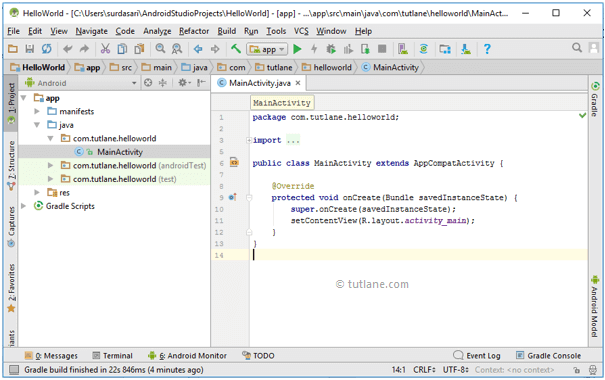
After clicking Finish, we will be presented with Android Studio's user interface with the project explorer on the left and the workspace on the right like as shown below.
To know more about the folders in android application, check this Android App Folder Structure. The following are the important files that we need to build our app in android studio.
The UI of our application will be designed in this file and it will contain Design and Text modes. It will exist in the layouts folder and the structure of activity_main.xml file in Design mode like as shown below.

We can make required design modifications in activity_main.xml file either using Design or Text modes. If we switch to Text mode activity_main.xml file will contain code like as shown below.
<?xml version="1.0" encoding="utf-8"?>
<android.support.constraint.ConstraintLayout xmlns:android="http://schemas.android.com/apk/res/android"
xmlns:app="http://schemas.android.com/apk/res-auto"
xmlns:tools="http://schemas.android.com/tools"
android:layout_width="match_parent"
android:layout_height="match_parent"
tools:context="com.tutlane.helloworld.MainActivity">
<TextView
android:layout_width="wrap_content"
android:layout_height="wrap_content"
android:text="Hello World!"
app:layout_constraintBottom_toBottomOf="parent"
app:layout_constraintLeft_toLeftOf="parent"
app:layout_constraintRight_toRightOf="parent"
app:layout_constraintTop_toTopOf="parent" />
</android.support.constraint.ConstraintLayout>
The main activity file in android application is MainActivity.java and it will exists in java folder. The MainActivity.java file will contain the java code to handle all the activities related to our app.
Following is the default code of MainActivity.java file which is generated by our HelloWorld application.
package com.tutlane.helloworld;
import android.support.v7.app.AppCompatActivity;
import android.os.Bundle;
public class MainActivity extends AppCompatActivity {
@Override
protected void onCreate(Bundle savedInstanceState) {
super.onCreate(savedInstanceState);
setContentView(R.layout.activity_main);
}
}
Generally, our application will contain multiple activities and we need to define all those activities in the AndroidManifest.xml file. In our manifest file, we need to mention the main activity for our app using the MAIN action and LAUNCHER category attributes in intent filters (<intent-filter>). In case if we didn’t mention the MAIN action or LAUNCHER category for the main activity, our app icon will not appear in the home screen’s list of apps.
Following is the default code of the AndroidManifest.xml file which is generated by our HelloWorld application.
To run android applications we need to click on Run button or press Shift + F10 like as shown below
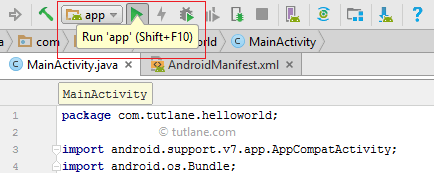
After clicking on the play button new window will open in that select Android Virtual Device (AVD) and click OK like as shown below.
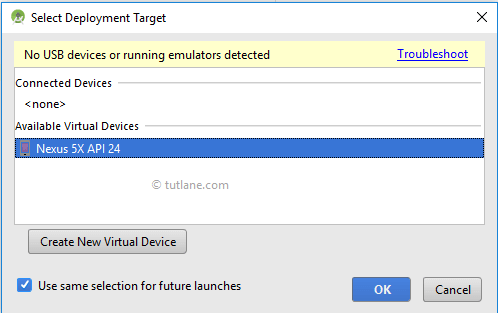
In case if you are not able to see any virtual device, then you need to create a virtual device to run your application for that check this Android Virtual Device Setup.
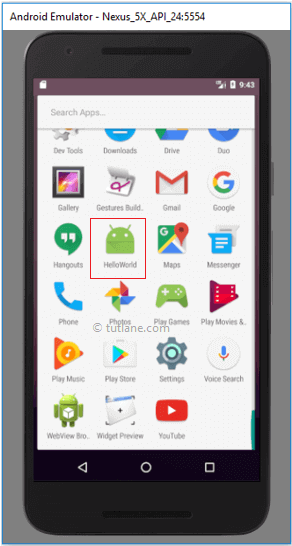
Now our android hello world application will show the result like as shown below

In our AndroidManifest.xml file, we mentioned the MAIN action and LAUNCHER category attributes for our main activity file due to that our app icon will create in Home screen list of apps like as shown below.
This is how we can create apps in android and execute applications based on our requirements.