Here we will learn how to use the Database First approach of Entity Framework for asp.net mvc application development. In asp.net mvc application, we will create a new EmployeeController class and write code that retrieves Employee data and displays it in the browser using a view template. To implement this, we will use the Database First approach of Entity Framework for development.
In the Database First approach, we need to have an existing database and create a business model from which we can use the Database First approach. Before starting directly with developing in MVC, let's begin with Exploring Database first.
Here is the database EmployeeDB which contains a single table EmployeeDetails that would be like as shown below.


We will use ADO.NET Entity Data Model (Entity framework) to get data from the database. To add this, right-click on Models Folder à Select Add à then select ADO.NET Entity Data Model. In that template, we will select the database as EmployeeDB and table as EmployeeDetails, as shown below.

After adding the model, our entity will be like as shown below.

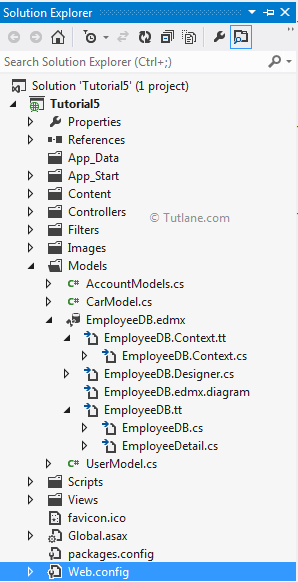
After adding the model, build the application, and the project structure will be like as shown below.
After adding ADO.NET Entity Data Model, we will add a controller. To add Controller, right-click on the controller folder à select Add à select controller and create a new controller with the name EmployeeController by selecting the below properties. To add a controller, our settings should be like as shown below.
Controller name: EmployeeController. (This is the default.)
Template: MVC Controller with read/write actions and views, using Entity Framework.
Model class: EmployeeDetail (Tutorial5.Models).
Data context class: EmployeeDBEntities (Tutorial5.Models).
Views: Razor (CSHTML). (The default.)

Note: Sometimes, you will not be seeing a Model class. In that case, you need to build the application.
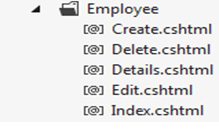
After clicking on the Add button following files and folders will be created. An EmployeeController.cs file in the project's Controllers folder and an Employee folder in the project's Views folder with the following files (Create.cshtml, Delete.cshtml, Details.cshtml, Edit.cshtml, and Index.cshtml) in the new Views\Employee folder.
Our controller EmployeeControll.cs file will contain code like as shown below.
using System;
using System.Collections.Generic;
using System.Data;
using System.Data.Entity;
using System.Linq;
using System.Web;
using System.Web.Mvc;
using Tutorial5.Models;
namespace Tutorial5.Controllers
{
public class EmployeeController: Controller
{
private EmployeeDBEntities db = new EmployeeDBEntities();
//
// GET: /Employee/
public ActionResult Index()
{
return View(db.EmployeeDetails.ToList());
}
//
// GET: /Employee/Details/5
public ActionResult Details(int id = 0)
{
EmployeeDetail employeedetail = db.EmployeeDetails.Find(id);
if (employeedetail == null)
{
return HttpNotFound();
}
return View(employeedetail);
}
//
// GET: /Employee/Create
public ActionResult Create()
{
return View();
}
//
// POST: /Employee/Create
[HttpPost]
public ActionResult Create(EmployeeDetail employeedetail)
{
if (ModelState.IsValid)
{
db.EmployeeDetails.Add(employeedetail);
db.SaveChanges();
return RedirectToAction("Index");
}
return View(employeedetail);
}
//
// GET: /Employee/Edit/5
public ActionResult Edit(int id = 0)
{
EmployeeDetail employeedetail = db.EmployeeDetails.Find(id);
if (employeedetail == null)
{
return HttpNotFound();
}
return View(employeedetail);
}
//
// POST: /Employee/Edit/5
[HttpPost]
public ActionResult Edit(EmployeeDetail employeedetail)
{
if (ModelState.IsValid)
{
db.Entry(employeedetail).State = EntityState.Modified;
db.SaveChanges();
return RedirectToAction("Index");
}
return View(employeedetail);
}
//
// GET: /Employee/Delete/5
public ActionResult Delete(int id = 0)
{
EmployeeDetail employeedetail = db.EmployeeDetails.Find(id);
if (employeedetail == null)
{
return HttpNotFound();
}
return View(employeedetail);
}
//
// POST: /Employee/Delete/5
[HttpPost, ActionName("Delete")]
public ActionResult Delete(int id, EmployeeDetail employeedetail)
{
employeedetail = db.EmployeeDetails.Find(id);
db.EmployeeDetails.Remove(employeedetail);
db.SaveChanges();
return RedirectToAction("Index");
}
protected override void Dispose(bool disposing)
{
db.Dispose();
base.Dispose(disposing);
}
}
}
ASP.NET MVC 4 automatically create CRUD (create, read, update, and delete) action methods and views for you (the automatic creation of CRUD action methods and views is known as scaffolding). You now have a fully functional MVC 4 web application that lets you create, list, edit, and Delete Employee entries.
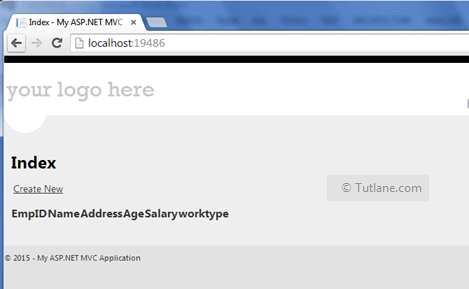
Now, run the application and access EmployeeController with the action method /Index. The first time you will access the EmployeeController/Index Action method, it will show the Empty list because we have not added data to it, and the URL will be like http://localhost:19486/Employee/Index.
Now click on the Create New link to add new employee details that will open a new screen to add employee details like as shown below.

After adding an Employee, it will be redirected to the Index page and display the entire list we have added.
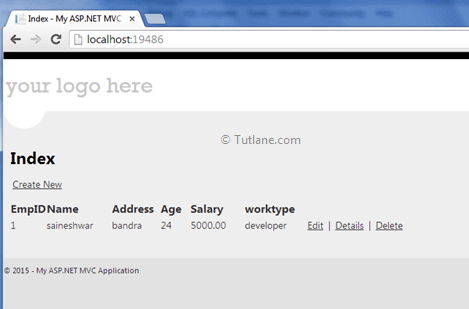
Selecting records from EmployeeDetails Table
Here it will show all records which we have recently entered.
