As discussed in the Node.js Introduction article, we can say that Node.js is a command-line tool that can be run as a regular web server and it let you run JavaScript programs by typing 'node my_app.js' in your terminal.
To work with node.js, we need to download and install the latest version of node.js from the https://nodejs.org/en URL. When we open the URL, it will automatically detect our OS and display the download link as per our operating system like as shown below.
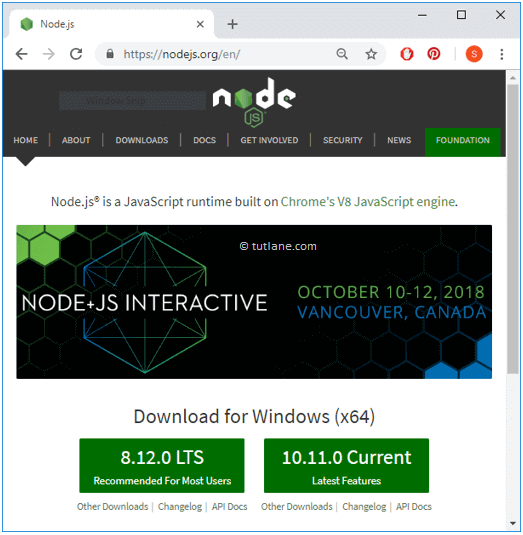
Here, if you observe it shows two download node.js versions for windows.
Based on your requirements, download a required node.js version for your windows by clicking on 8.12.0 LTS or 10.11.0 Current button. In our tutorial, we are going to use 10.11.0 Current latest version for windows.
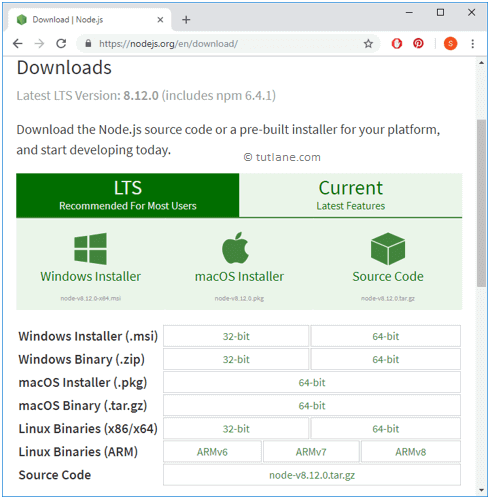
Even you can see the different node.js download versions available for different platforms like MAC, Linux, etc. by clicking on the Downloads tab or navigating to https://nodejs.org/en/download URL like as shown below.
As we have downloaded a node.js installer for windows, now we will install it in our windows machine for that double click on the setup file to start the installation process like as shown below.

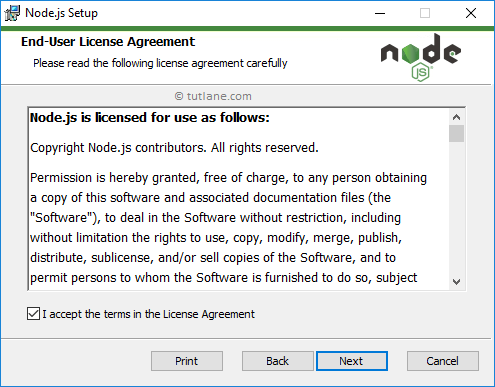
Now, click on the Next button to get started with the actual download process, when you click on the Next button, the installation process will start and it will you ask to accept terms and conditions to proceed further like as shown below.
When we click on the Next button, we need to provide the installation location in which we want to store node.js related configuration files and click on the Next button like as shown below.

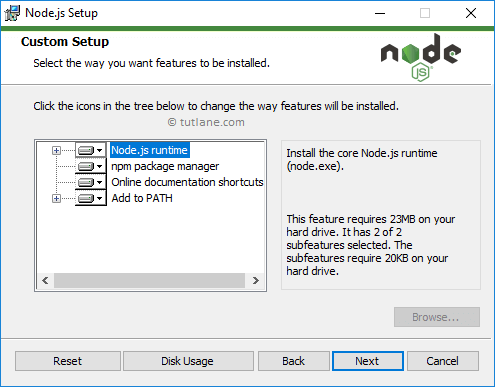
The next step is to select the features as per your requirement to install on your machine. To develop an application using Node.js, we required a Node.js runtime, npm package manager so we are proceeding with the default selections by clicking on the Next button like as shown below.
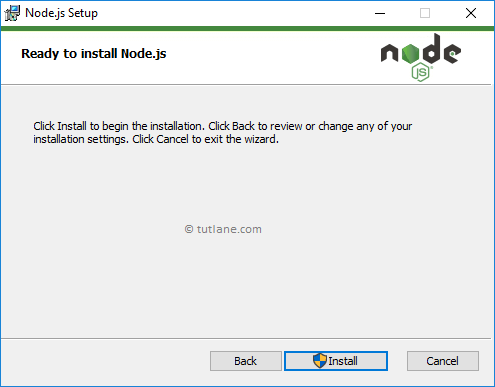
After completion of primary configurations, now we are ready to install node.js in our windows machine by clicking on the Install button like as shown below.
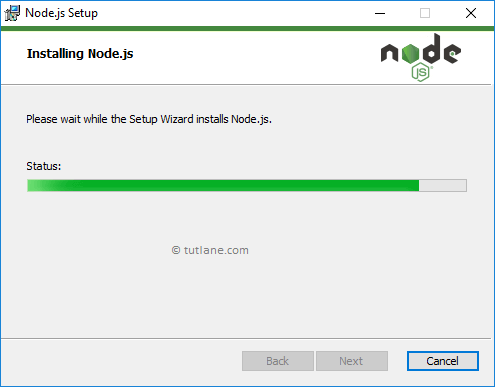
After we click on the Install button, now the node.js setup process will start and you can see the progress of the node.js installation like as shown below.
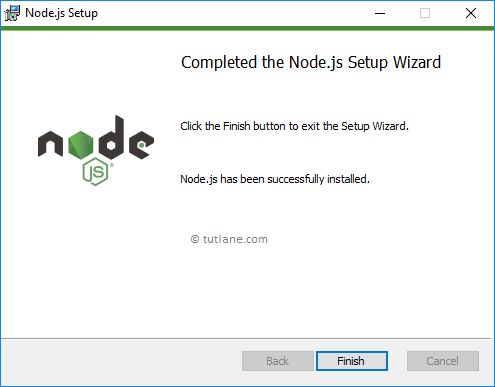
After completion of node.js installation, we can see the success message window like as shown below and click on the Finish button to close the setup wizard.
After completion of node.js installation on our machine, we can verify it by opening command prompt and typing node -v. If node.js installed successfully, then it will display the version of node.js installed on our machine for that open command prompt and type command node -v like as shown below.
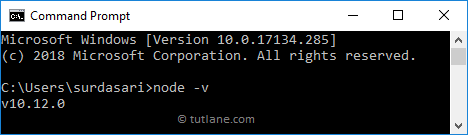
If you observe the above result, we got a version of node.js 10.12.0 which we installed on our windows machine which means node.js installed successfully.
Same way, you can install node.js on other operating systems such as Linux, Mac, etc. by downloading required components from https://nodejs.org/en/download URL based on your requirements.
In the next chapters, we will learn how to use node.js to build applications with examples.