In node.js, HTTP module is a core module and it is useful to transfer the data over HTTP (hypertext protocol transfer).
Generally, in node.js we can include or import a modules by using require directive with module name so to include HTTP module, we need to use require() function like as shown below.
// importing node.js built-in http module
var http = require('http');
In node.js, by using HTTP module we can create HTTP server that listens on particular port and send the response back to the client.
Once, we import an http module by using require directive, our node.js application is having access to the HTTP module so we can create a web server using the createServer() method to listen a request and response on the particular port number like as shown below.
// import node.js built-in http module
var http = require('http');
// creating server
http.createServer(function (req, res) {
// Write response to client
res.write('Hello World!');
// End the response
res.end();
}).listen(4200); // Server object listen on port 4200
If you observe above code, we imported an http module by using require directive to access an HTTP module and created a HTTP server using createServer() method to listen the request (req) and response (res) on port number 4200.
Here, the function in http.createServer() method will be executed when someone tries to access our computer on port 4200.
Save the above code in a file called “Helloworld.js” and initiate it by entering a command like as shown following in node.js command prompt.

Now your computer will work as a server so if anyone tries to access your computer with port 4200 then in return, they will get a “Hello world” message like as shown below.

This is how we can create a web server using HTTP module to manage the requests and responses by listening on a particular port and send the response back to the client.
In node.js, HTTP header is useful to define a type of response i.e. either plain text, HTML or JSON, etc. based on our requirements. In node.js, by using either writeHead() or setHeader() methods, we can set the server response type.
If you observe the above example, we didn’t mention any HTTP header type so the server will return the response as plain text even if it contain any HTML markups. In case, if you want the response from the HTTP server as HTML, then we need to include HTTP header with the content type as text/html like as shown below.
response.writeHead(200, {'Content-Type':'text/html'})
//or
response.setHeader('content-type','text/html');
response.setHeader(200);
If you observe above statements, we defined a writeHead() and setHeader() methods with response status code (200) and return type (text/html). In node.js, writeHead() and setHeader() methods will do the same job but only difference is setHeader() will allow us to set singular header at a time and writeHead() will allow us to set multiple headers.
Following is the example of adding an HTTP header to return the response type as HTML in node.js.
var http = require('http');
http.createServer(function (req, res) {
// response header to display content as html
res.writeHead(200, {'Content-Type':'text/html'})
// Write response to client
res.write('<b>Hi Guest</b><br/>');
res.write('<span style="font-weight:bold; color:Green">Welcome to Tutlane</span>');
res.end();
}).listen(4200, console.info("Server listening on port 4200"));
Save the above code in a file called “serverhead.js” and initiate it by entering a command like as shown following in node.js command prompt.
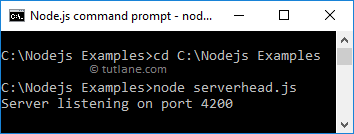
Now your computer will work as a server so if anyone tries to access your computer with port 4200 then in return, they will get a response in html format like as shown below.

If you observe example, the node.js HTTP server has returned the response in html format after adding the HTTP header.
In the above examples, while creating the HTTP server we are passing a function with the request (req) and response (res) arguments. The request (req) argument in the function is useful to handle the requests from the client and it’s having different properties like query string, body, events, etc.
Following is the example of reading the query string parameters using HTTP server request properties in node.js.
var http = require('http');
http.createServer(function (req, res) {
res.writeHead(200, {'Content-Type':'text/html'})
res.write(req.url);
res.end();
}).listen(4200, console.info("Server listening on port 4200"));
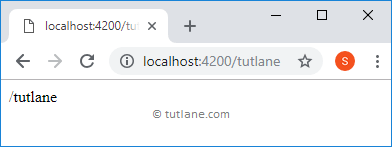
If you observe above example, we are trying to read the query string parameter details using request object property called “url”. The url property is useful to read the part of url that comes after the domain name.
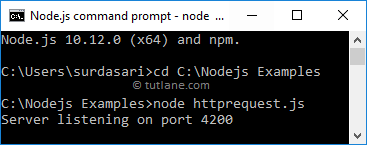
Save the above code in a file called “httprequest.js” and initiate it by entering a command like as shown following in node.js command prompt.
Now your computer will work as a server so if you try to access http://localhost:4200/tutlane URL then in return, you will get the response like as shown below.
In case, if you change the URL like http://localhost:4200/nodejs and click enter you will get the response like as shown below.

Like this, we can get and perform multiple operations on HTTP server request. We will learn more about HTTP server request in further chapters.
Generally, while working with the HTTP server there might be a chance that we will get an exception so in node.js, we can handle those exceptions like as shown below.
var http = require('http');
const server = http.createServer(function (req, res) {
res.writeHead(200, {'Content-Type':'text/html'})
res.write('Hello World!');
res.end();
});
// It will handle the errors in server
server.on('error', (err) => {
throw err;
});
server.listen(4200, () => {
console.log('Server listening on port : 4000');
});
This is how we can use HTTP module in node.js to perform multiple operations like creating a HTTP server that listens on particular port to handle request and response based on our requirements.